Free · runs in your browser
Kitchen design tool
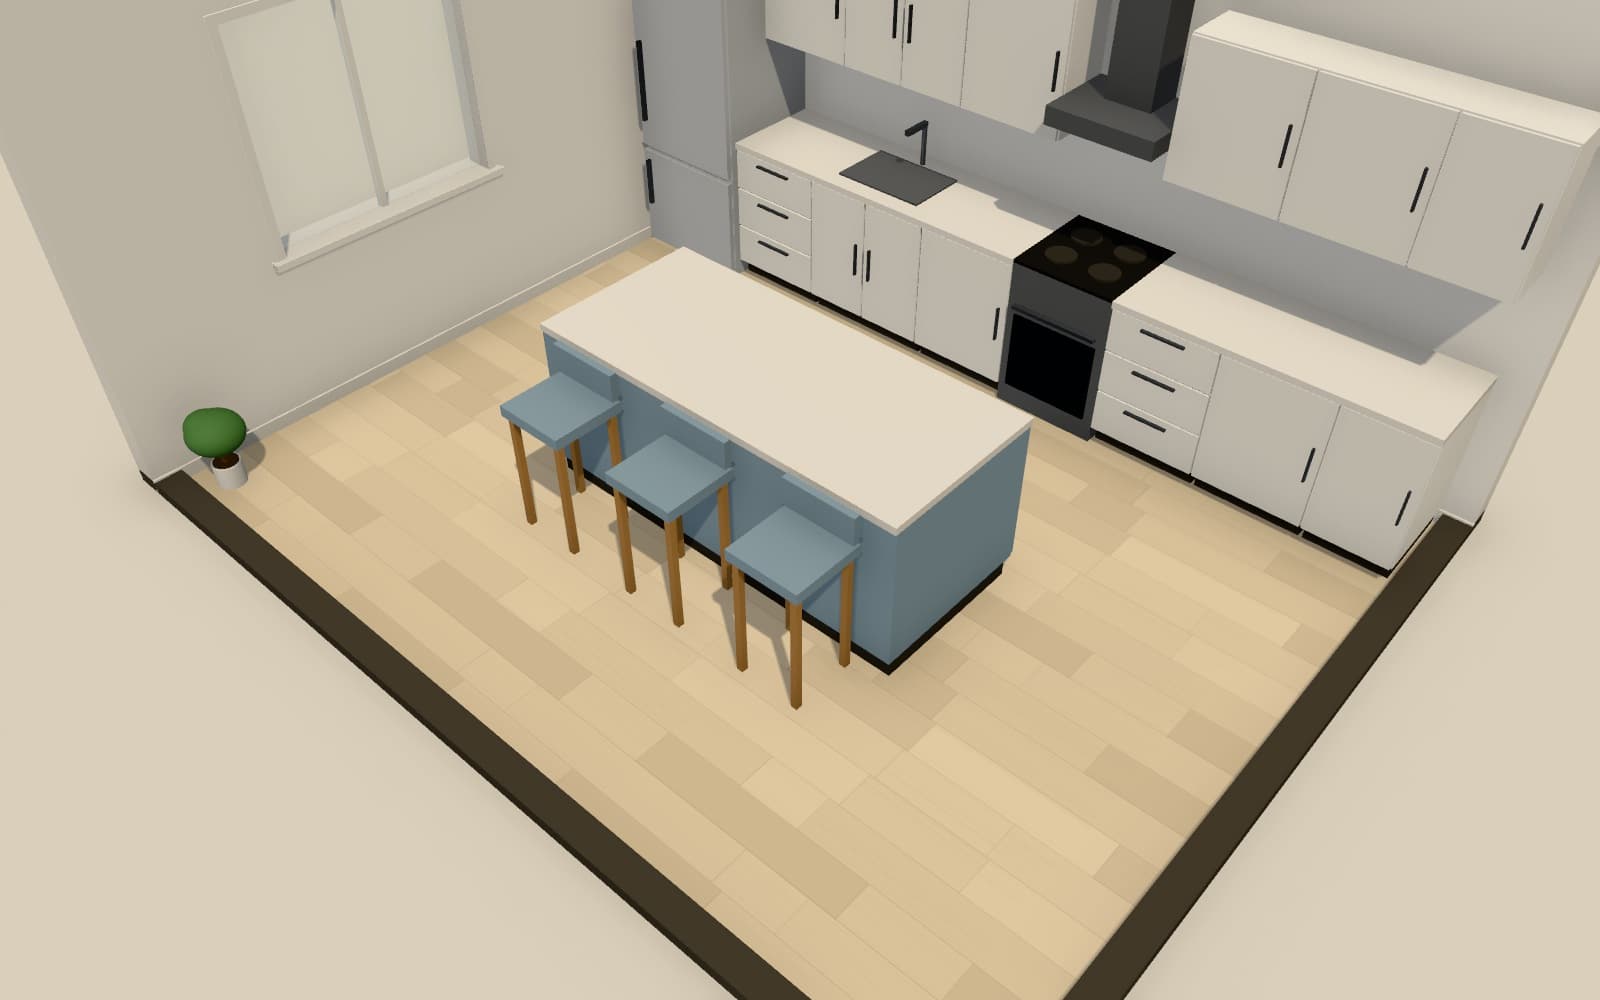
Once the layout works, the look of a kitchen comes down to surfaces and light. Plan the units in the kitchen planner, then bring the kitchen into Arcvelle Studio to try floor tiles and timber, tiled or panelled walls, paint colours and lighting, and to render the result for anyone who needs to see it.
What is the difference between a kitchen planner and a kitchen design tool?
A kitchen planner settles the layout: shape, units, appliances and worktops. A kitchen design tool covers how it looks. In Arcvelle you do the first in the kitchen planner and the second in Arcvelle Studio, where you choose floor finishes, tiled or panelled walls, paint and ceiling colour, view it under four lighting presets and render stills.
What it does
Features
Floors for kitchens
Tiles, stone, terrazzo, concrete and timber are among the 17 floor finishes, so you can compare a practical tile with a warmer wood.
Tiled and panelled walls
Apply tile panelling where a splashback or tiled wall would go, or timber slats and wainscot for a softer look.
Kitchen and dining models
Add stools, dining tables, lighting and decor from the kitchen, dining and lighting categories, resized to fit.
Light at different times
Check a north-facing kitchen under soft overcast light, or see how it reads in the evening with lamps on.
Renders and quotes
Render stills up to 4K, then use the bill of materials with your own prices to produce a quote.
How to
How to use the kitchen design tool
Step 1: Plan the layout
Use the kitchen planner to set the shape, island, sink, hob and worktops.
Step 2: Bring it into the Studio
Send the kitchen to Arcvelle Studio so it sits in your floor plan with the rooms around it.
Step 3: Choose finishes
Set the floor, wall tiling or panelling, paint and ceiling colour, and add stools and lighting.
Step 4: Render and share
Save named views, render stills and send a share link or PDF quote.
Step-by-step guide: Kitchen planner
Use cases
Who it is for
Choosing a floor
Compare large-format tiles with oak boards in the same kitchen before ordering samples.
Showing a client the finish
Give a client renders of the kitchen from the angles they care about, with the finishes you propose.
Kitchen-diner schemes
Make sure the kitchen and the dining area beside it share a palette that works together.
Questions
Frequently asked questions
Can I show a tiled splashback?
Yes. Wall panelling includes a tile option, which you can apply to the walls behind worktops. Wainscot and timber slats are also available for other walls.
Can I change colours on kitchen furniture?
Models in Arcvelle Studio can be recoloured, so stools, tables and other pieces can be set to the colours you are considering. Walls can be painted with preset or custom colours.
How high a resolution can I render my kitchen?
Still renders go up to 4K (3840 × 2160), with Full HD, 2K, square and portrait options. Renders are produced on your own device.
Can I get a price for the kitchen finishes?
The bill of materials measures flooring, paint and other items from your design. You add unit prices, currency and tax rate, and it produces a CSV or an A4 PDF quote.
Is the kitchen design tool a separate app?
No. Layout happens in the kitchen planner and the finishing work happens in Arcvelle Studio. Both run in the browser, are free and need no account.
Start designing in your browser
Arcvelle Studio is free and needs no account. Your projects stay in this browser.